Transaction Review Process
Page Overview
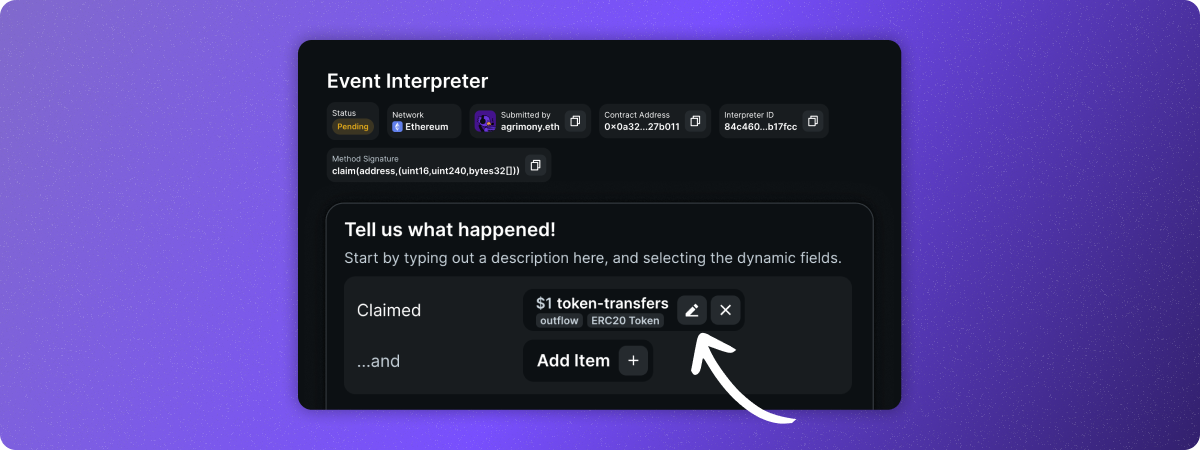
On the left side of the review page, you will find the transaction information submitted by the interpreter. You can modify, add, or remove any information. Click the pen icon to edit an element and the X icon to delete an element. Modify action verbs by deleting the text and entering a new one.
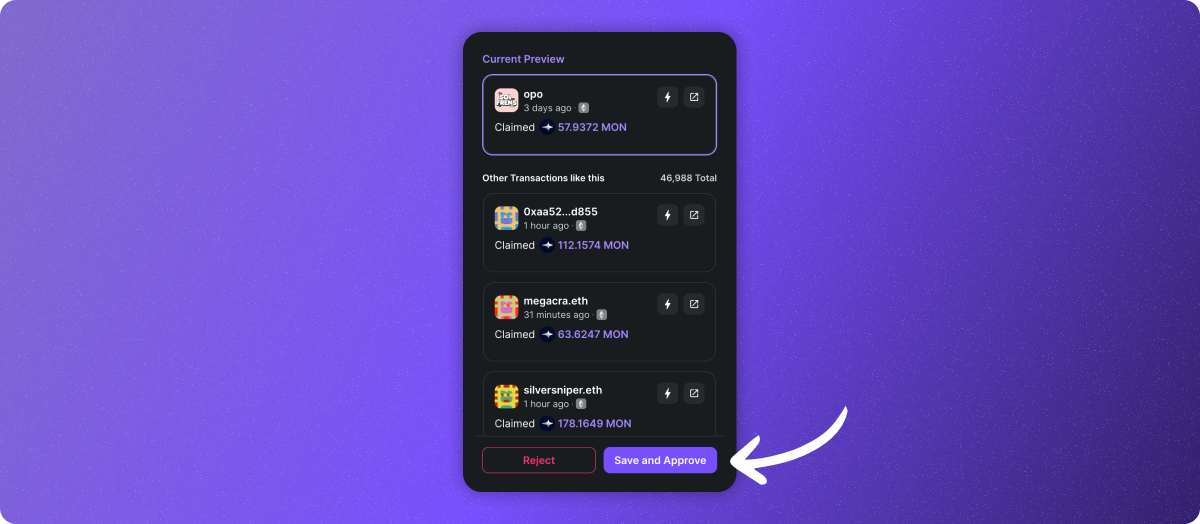
On the right side, you will find a preview feed to confirm if the transaction has been correctly interpreted for all transaction. Scroll down to see 12 different transactions with the same method to ensure accuracy.
Steps to Review an Transaction
- Choose a transaction to review
- Get more context on the chosen transaction
- Review the submission
- Approve or Reject
Start with transactions on apps you are familiar with or have done in the past.
Resources for Reviewing
- Contract address
- Zapper transaction page
- Block explorers
Decision Making and Checklist
To ensure quality across all interpretations, validate key elements of the TI before approving it.
Note: Validate even if the preview feed indicates all transactions are returning a result.
| Question | Action if YES | Action if NO | Tips |
|---|---|---|---|
| 1. Has the transaction already been interpreted? | Reject the submission and add a reason. | Go to next step | Open the transaction on Zapper to see if it’s labeled as did something. |
| 2. Is the verb or description used to describe the initial action accurate? | Go to next step. | 1. Adjust the verb and description to make it accurate or to standardize it. | Open the explorer to see more details on the transaction. The method name can also be a good indicator. |
| 3. Did the user submit the correct item type? | Go to next step | 1. Select the correct item type 2. Go to next step | You might also have to add an item to make the transaction even more complete. |
| 4. Is the item type as accurate and inclusive as it can be? | Go to next step | 1. Select the correct item type 2. Go to next step | Example: Selecting a token contract for an ERC20 transaction will return a result, but won’t display the inflow or outflow amount. Change the item type for a token transfer to be more accurate. |
| 5. Does the preview return a value for all 12 previewed transactions? | Go to next step | 1. Investigate the transactions with missing information. i.e. open explorer 2. You might have to select a more inclusive item type. Go back to question 4. 3. If you find that you have to create a conditional transaction, create a new case and confirm the new preview before moving to next step | Failed transactions will be displayed as incomplete previews. If all the incomplete transactions in the preview are failed ones, carry on to next step |
| 6. Did the user submit an app? | Go to next step | Go to question 8. | |
| 7. Are you able to confirm that the submitted app is the correct one? | Go to question 9. | 1. Set the app as None 2. Hit save and Approve | Open the contract in the explorer to find the name of the protocol. The deployer of the contract can also give you a good idea. You can alternatively search on Github, Google, or X with the contract address. |
| 8. Are you able to find the app yourself? | Go to next step | 1. Set the app as None 2. Hit save and Approve | Open the contract in the explorer to find the name of the protocol. The deployer of the contract can also give you a good idea. You can alternatively search on Github, Google, or X with the contract address. |
| 9. Is the app available in the dropdown? | 1. Select the app from the dropdown 2. Hit save and Approve | 1. Set the app as None 2. Hit save and Approve |
Approving a Transaction
If the transaction interpretation is accurate, complete, and consistent, it is ready for approval. Go to the bottom of the review page and press “Save and Approve”.
This will confirm the transaction interpretation and apply it to all similar transactions.
After hitting the “Save and Approve” button, the status changes from Pending to Enabled.
Rejecting a Transaction
Some transactions may need to be rejected for various reasons:
- The transaction has already been interpreted (duplicate)
- The transaction needs more details to be complete, and these details couldn't be found through research
- Duplicate submissions from the same user
- Spam submissions lacking substantive information
After hitting the “Reject” button and selecting a reason, the transactions status changes from Pending to Rejected.